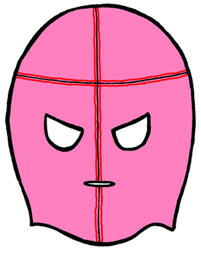
マネキンからマスクを取って表から縫います(赤い部分)
Remove the mask from the mannequin and sew from the front side (red part)
縫い終ったらまたマネキンに裏返し被せましょう
鼻の先端は少し折り曲げてください
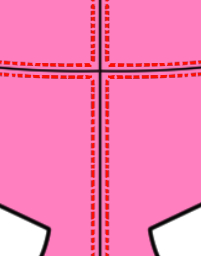
その上に補強のための綿テープを貼ります
(太めのもの。後で首部分に使う綿テープで良いです)
紐通し部分も同じモノでカットします
Use a punch to make a hole for the string to pass through.
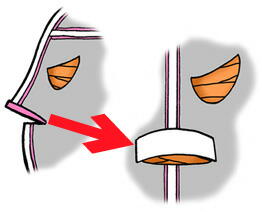
次は首の部分を補強します
16ミリ位の綿のテープを縫い付けます
始めに表に重ねて2ミリ位の部分を縫いましょう
Next, we will reinforce the neck part.
Sew on a 16mm cotton tape.
First, overlap the front side and sew about 2 mm apart.

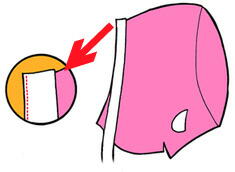
縫い終ったら綿テープを裏に折り返します
次は裏から綿テープを縫ってください
After sewing, fold the cotton tape back
Next, sew the cotton tape from the back..
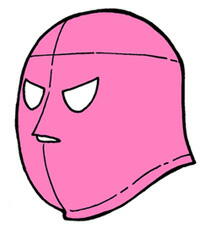
これでマスクのベースが完成!
The base of the mask is now complete!

べロをつくりましょう
ベロは髪の毛等をヒモに巻き込まないように付けるものです
裁断したべロ部分の生地を裏返して他の生地の表に重ねて縫います
縫い終ったら裁断してください、
袋の状態になってるので裏返して5ミリ程の所を縫いましょう
これでべロは完成です!
Let's make BERO
The BERO is used to prevent hair from getting caught in the string.
Turn the cut BERO fabric inside out and sew it on top of the other fabric.
After sewing, please cut it out.
Since it is now a bag, turn it inside out and sew about 5mm apart.
BERO is now complete!